
Hostwinds Tutorials
Search results for:
Table of Contents
How to Setup Private Nameservers
Tags: Nameservers
There may be times where you are required to create a private nameserver. For example, you may want to do this to add another layer of customization to your web hosting services. This article will walk you through creating custom nameservers that you can use for your domains hosted at Hostwinds.com.
Creating Private Nameservers
Step 1: Log in to your Client Area
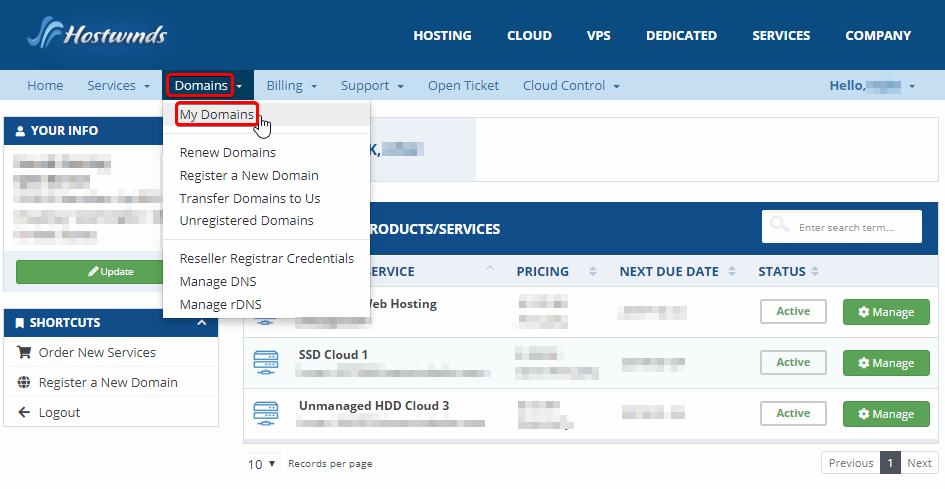
Step 2: Click on Domains, then click on My Domains from the drop-down menu.
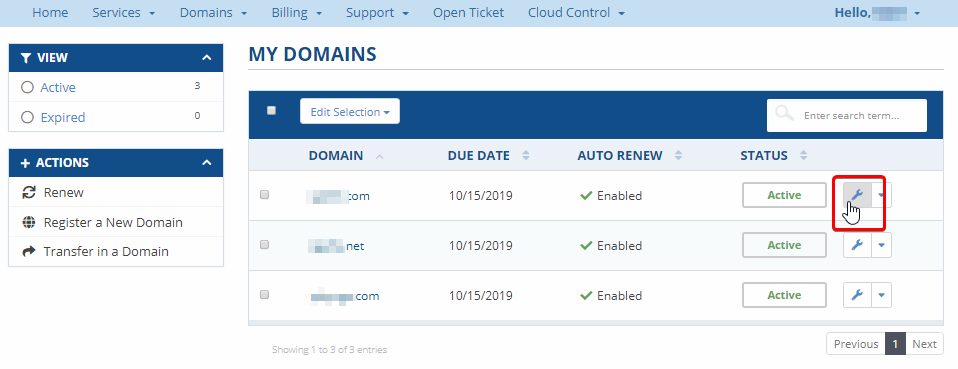
Step 3: Click the wrench icon next to the domain you wish to create Nameservers for
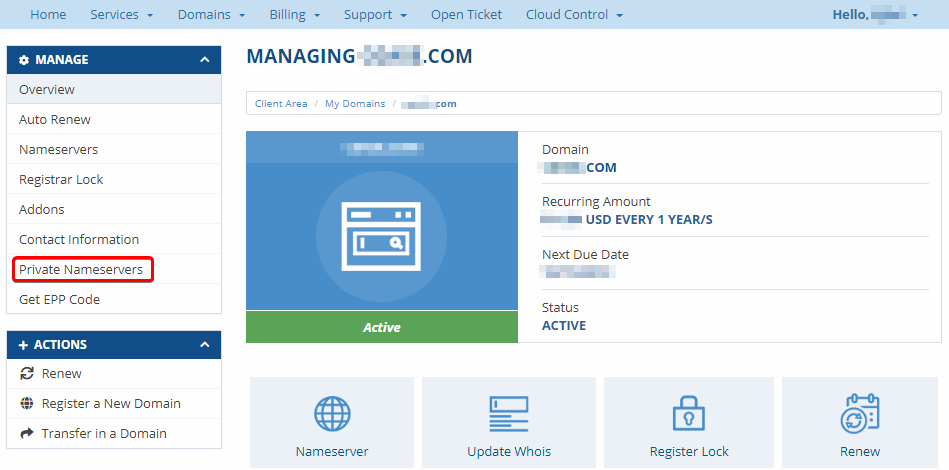
Step 4: Click Private Nameservers from the menu on the left side of the page.
Step 5: Type in the Nameserver you want to create, the IP Address you wish to point it to and click Save Changes
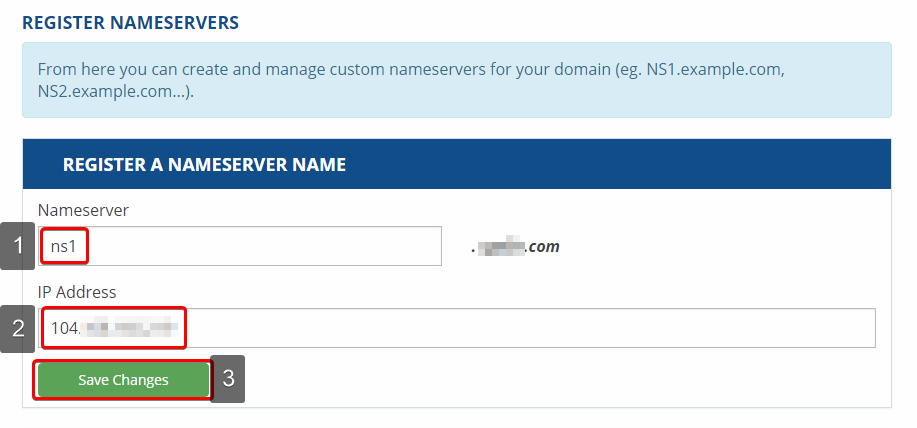
Step 6: Repeat Step 5 for the second nameserver you wish to create.
That's it! It may take up to 24 hours for these Nameservers to be fully considered authoritative, but they are ready to use.
You are now ready to provide these nameservers to your domains hosted at Hostwinds. This includes the one that is being used as the root of the custom nameservers here.
Which IP you use when creating the private nameservers entirely depends on how your site is being hosted. Choose the IP of the nameservers we provide in the welcome email if you try to mask the Hostwinds DNS Nameservers on Shared and Business hosting plans. If you are hosting on a VPS or Dedicated server using a DNS Manager within, you would want to use IP Addresses that point to your VPS or Dedicated server by adding additional IPs to your server. If you have further questions about this, please reach us via Live Chat.
Written by Michael Brower / June 11, 2021