
Hostwinds Tutorials
Search results for:
Table of Contents
PuTTY: Setting Up SSH Key
Tags: Security
This guide walks you through setting up and configuring an SSH key in the Hostwinds Cloud Control Panel, assuming you don't already have one setup.
If you are unfamiliar with locating your Cloud Control Panel, please let us know via Live Chat, and we could help.
Creating an SSH Key
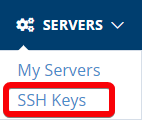
Navigate to the SSH Keys tab, found under the Servers drop-down as shown below:
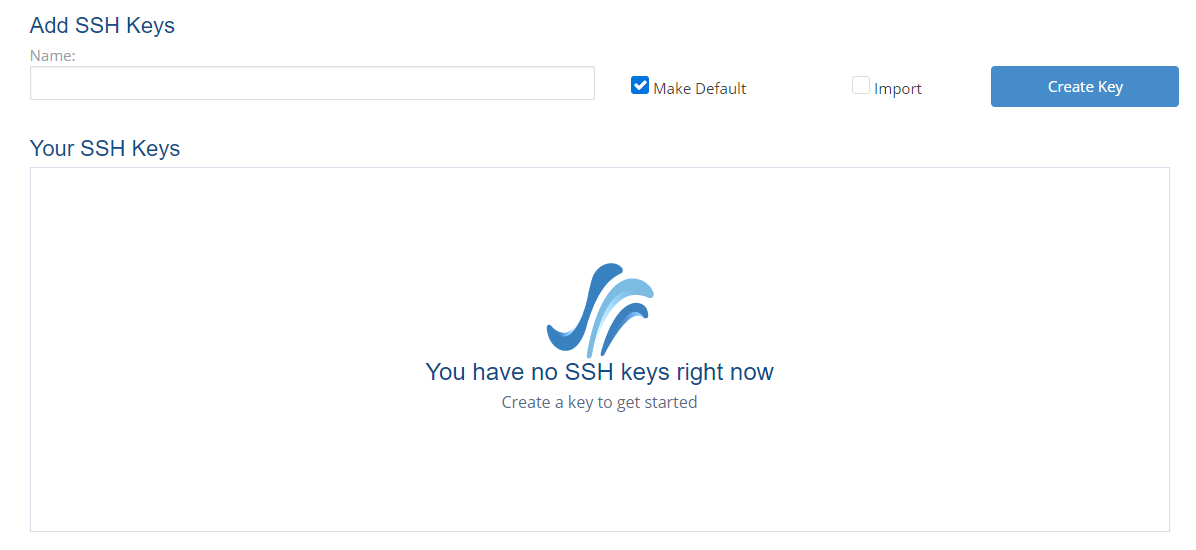
Once you have entered into the SSH Keys screen in your Cloud Control, you'll see a screen similar to the one shown below:
Naming The Key
Name the key something memorable for how it'll be used. Is this a key for you and all of your instances? Key names such as GlobalKey, JimsKey, DALKey, and SEAKey are great choices for names to remember what they're to be used for.
In this example, I'll be naming the key GlobalKey, as it'll be my Default key for all of my instances.

Creating Key
Pressing Create Key will begin the process to have the key created.
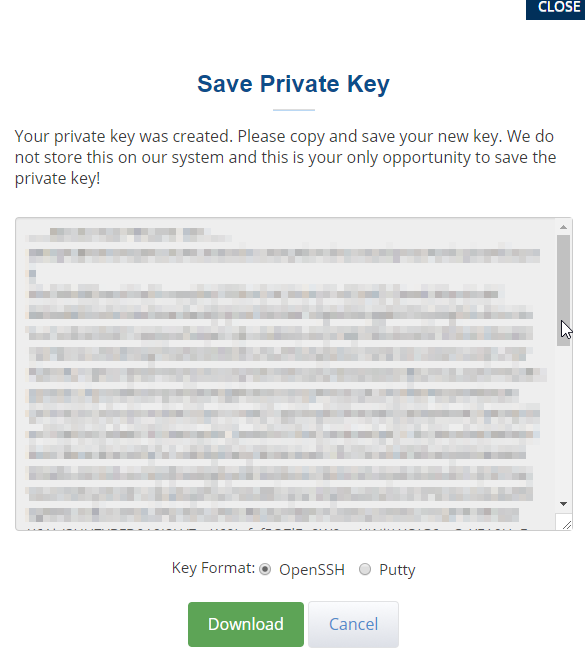
Select the radio button for PuTTY, as this is the terminal we will be using in this tutorial.
From there, press the Download button. Ensure that you save the file in a location you'll remember... somewhere where it won't get lost or removed easily.
Download PuTTY
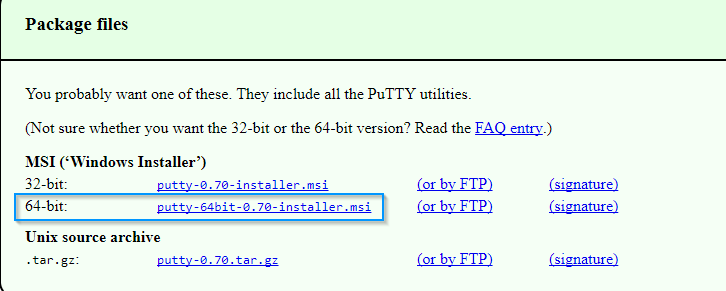
https://www.chiark.greenend.org.uk/~sgtatham/putty/latest.html
This is the page you can find Putty at. Select 32-Bit or 64-Bit based on the PC you're using. The vast majority of more recent PCs these days are 64-Bit.
Once downloaded, open the .msi file and proceed with the installation steps. All of the default options will work perfectly fine for this setup.
Open PuTTY and Set Default Settings

Now you can find PuTTY in your programs and files on your computer. PuTTY will have installed other software pieces, but the one you want to open is just called PuTTY.
Once opened, the display will appear as follows:

Setting Authentication (SSH) Keys
In the left panel labeled Category: press the + next to SSH to expand the menu selection.
From there, select the category Auth as seen below:
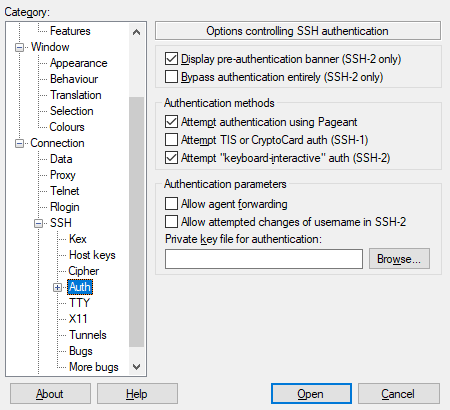
This is where we'll be specifying the SSH Key you downloaded. Using the Browse button displayed above, select the SSH Private Key you saved earlier in the tutorial.
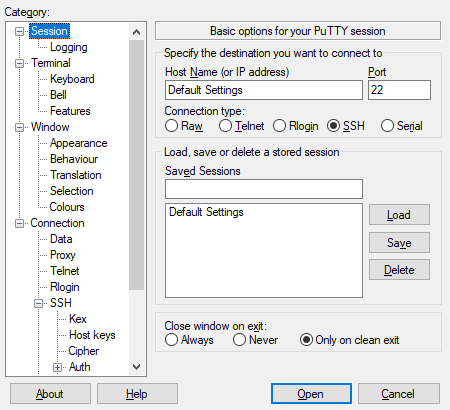
Saving PuTTY Settings
PuTTY is a little bit confusing in terms of saving your settings. To do so, you'll now navigate back to the first panel displayed when you originally opened PuTTY.
Select Session underneath the Category: left panel, as seen below:
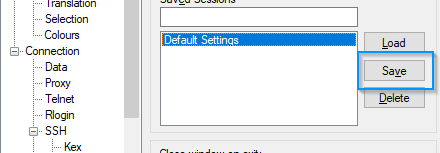
Next, select the field Default Settings and press the Save button to the right of the box.
Adding SSH Key to your instance
Now, navigate to an instance in your Cloud Control panel that you wish to have the SSH Key applied to.
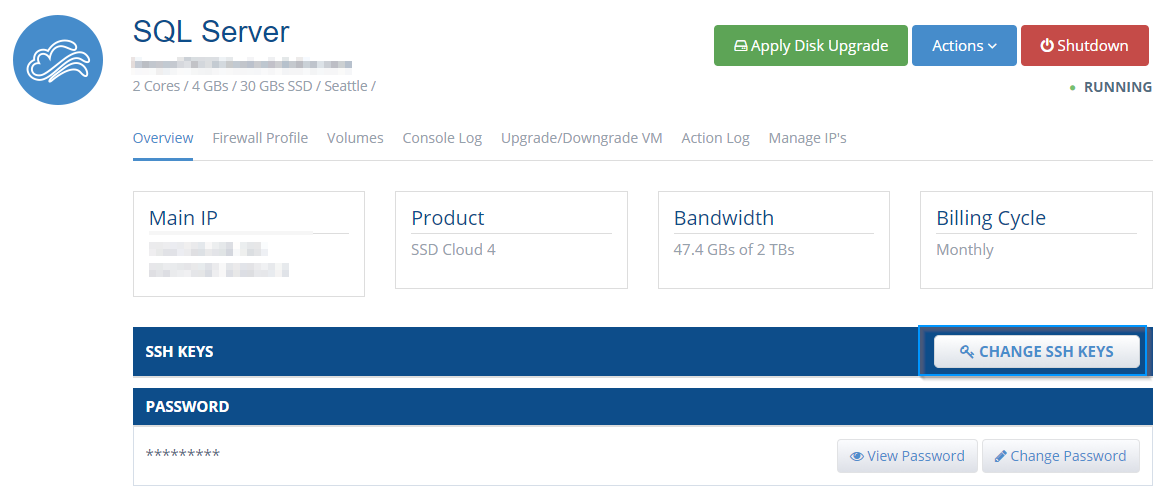
Press the Change SSH Keys and select the SSH Key you named at the beginning of this tutorial. A reboot is required to add the SSH Key to the instance, so perform a reboot on the instance when you're able to do so.
Afterward, your SSH Key has been applied to the instance.
Logging into your Instance with your SSH Key
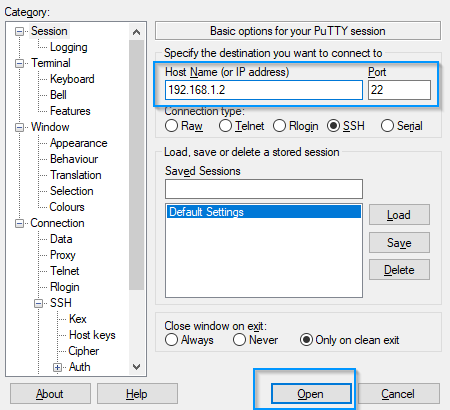
Now you can log in to your instance through the use of your SSH key. With PuTTY open, enter your IP address in the Host Name (or IP address) field and press Open.
Unless you've specifically set your SSH port to another Port, the default Port is 22.
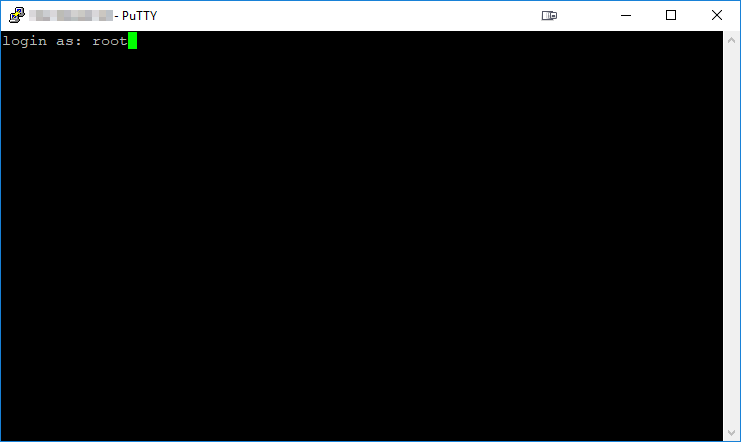
A window will pop up requesting the username you wish to use to log in to the terminal. The default for most Operating Systems is root.
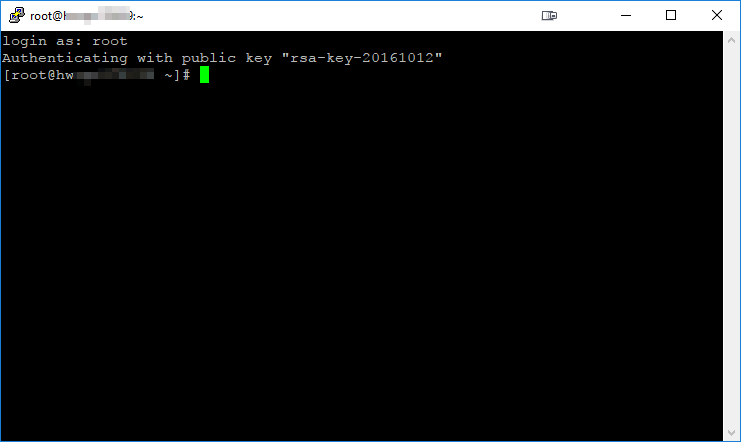
Press enter once this has been entered in. The next display shows that your authentication was with the public key you've just set up with PuTTY. It should be similar to the one below:
Written by Michael Brower / June 11, 2021